
Documentation
LilSEO Documention
A detailed guide with step-by-step instructions on how to use our Local SEO Plugin.
Simple, straight-forward and to the point.
LilSEO Plugin Installation Guide
Installing our Local SEO Plugin is a straightforward process, designed to require very little technical knowledge. Whether you’re a beginner or an experienced WordPress user, you’ll find the steps quick and easy to follow.
The LilSEO plugin is a powerful tool that anyone with basic knowledge of WordPress can use to enhance their local SEO efforts and optimize their website. Follow the steps below to get started.
Step 1: Create an Account on LilSEO.com
Before installing the plugin, ensure that you have created an account on LilSEO.com. Creating an account is completely free and gives you access to our powerful SEO tools, as well as a free trial period to test out the plugin before committing to a plan.
Once your account is created:
- You will automatically receive a 30-day free trial of the plugin.
- You can always find your current license key in your LilSEO Settings Page.
Step 2: Download the Plugin
Once you’ve created your account and received your activation key, you’re ready to download the LilSEO plugin.
- Log in to your account on LilSEO.com.
- Navigate to the Download Section of your account dashboard.
- You will see a list of available versions of the plugin. Choose the latest version (recommended for the best features and stability) and click the Download button.
The plugin will be downloaded as a .zip file, which is the standard format for WordPress plugin installations.
Step 3: Install the Plugin on WordPress
Now that you’ve downloaded the plugin, it’s time to install it on your WordPress website. Follow these simple steps:
Method 1: Upload via WordPress Dashboard
- Log in to your WordPress admin panel (yourwebsite.com/wp-admin).
- In the left-hand menu, navigate to Plugins > Add New.
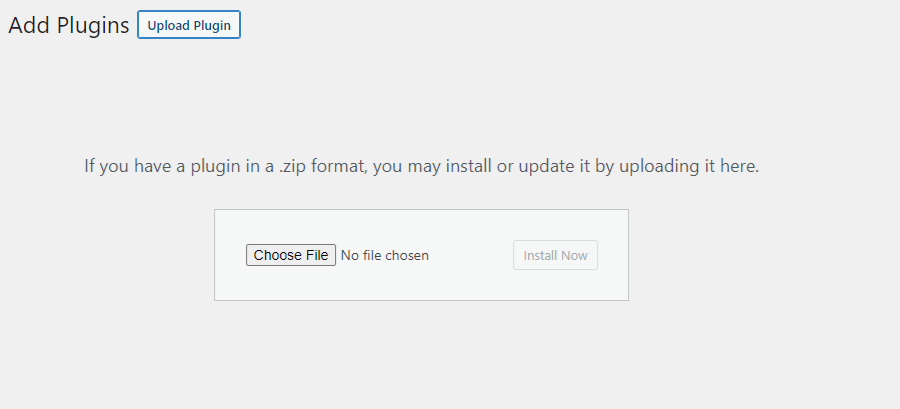
- At the top of the page, click the Upload Plugin button.
- Click Choose File and select the
.zipfile you downloaded from LilSEO. - Once selected, click Install Now.
- WordPress will upload and unpack the plugin. After the upload is complete, click the Activate Plugin button to activate LilSEO.
Method 2: Install via FTP
If you prefer to install the plugin using an FTP client, you can also upload it manually to your server.
- Unzip the
.zipfile you downloaded from LilSEO. - Open your FTP client (e.g., FileZilla) and connect to your WordPress hosting server.
- Navigate to the
wp-content/plugins/directory in your WordPress installation. - Upload the entire unzipped lilseo folder into the
pluginsdirectory. - Once uploaded, log in to your WordPress admin panel and go to Plugins > Installed Plugins.
- Find the LilSEO plugin in the list and click Activate.
Note: If you’re unfamiliar with FTP, we recommend using the WordPress dashboard method (Method 1), as it’s more straightforward for beginners.
Troubleshooting Installation Issues
If you encounter any issues during the installation process, here are a few common solutions:
- Plugin Installation Fails: Ensure your WordPress site is up-to-date and meets the minimum requirements (PHP 7.0 or higher, WordPress 5.0 or higher).
- License Activation Error: Double-check that you are entering the correct license key. If the problem persists, contact LilSEO support for assistance.
- Plugin Conflicts: If you are experiencing plugin conflicts, try deactivating other plugins one by one to see if the issue resolves.